
I’ve started on a strange journey, one I didn’t think was possible before. I don’t even know if it is possible now, though I have started on it. I’m attempting to do all of my development work and teaching Angular on a Pixelbook.
I’m not the first to start this journey, but I haven’t found a lot of coherent documentation about it, so I want to write what I have learned down for those that might go after me.
Relatively recently, using Linux on a Pixelbook got a lot easier. Using linux means that many of the tools that I use (node, npm, the Angular CLI, NX, and others) will just work. The other tools, like an IDE, graphical Git interface, diff tools, and others, I wasn’t so sure of. Turns out, most of them just work too, it’s like working on a Mac a few years ago, before I made my ill fated switch to Windows for a while. (Corner me at a conference or ask me in the comments and I’ll unpack that last sentence about Mac and Windows for you.)
Setting up Linux
It’s a lot easier than it used to be. You essentially just turn it on in your Pixelbook settings. It may work with newer Chromebooks, but I don’t have one of those to test with. The full instructions are here, along with troubleshooting steps: https://support.google.com/pixelbook/answer/9031351?hl=en&ref_topic=9146794
Don’t forget to occasionally check for Linux updates with sudo apt-get update && sudo apt-get dist-upgrade. I don’t know if there is an automated way to do this, so let me know if anyone finds one.
The flavor of Linux the Pixelbook uses is Debian. So far, anything I have used that supports a Debian install has worked out of the box.
The File System
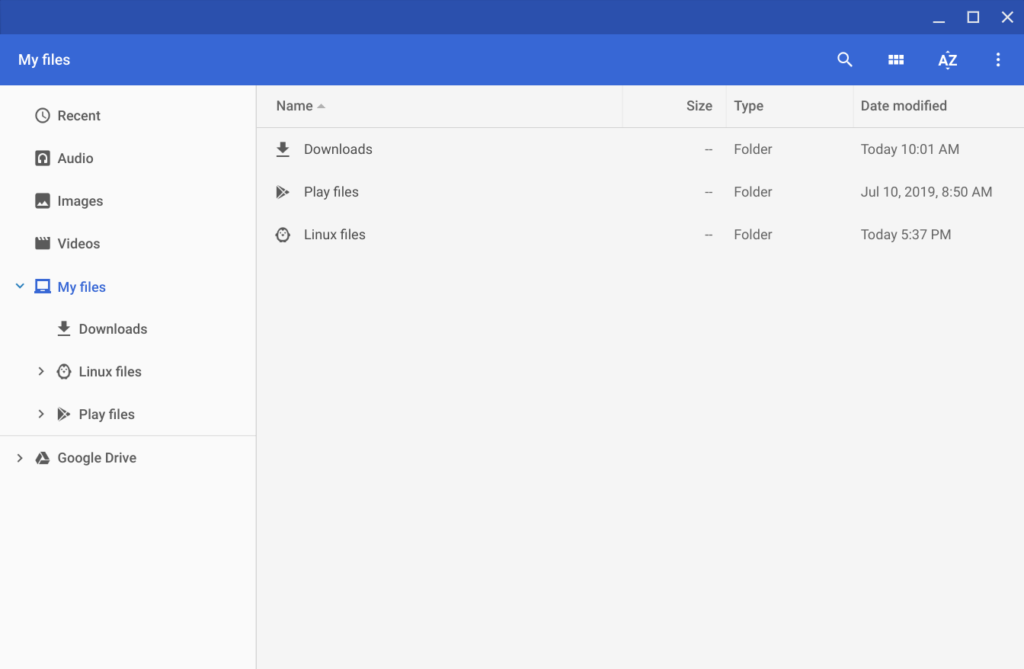
The files Linux has access to is in a different area than the normal Chrome OS file system. Chrome OS has a nice way of copying files over from one to the other though. So if you download something from your browser it is a simple copy away from being able to be used in your Linux partition.
If you open up the Files folder on Chrome OS, you’ll see a list of files in Chrome OS but also in the left hand nav you will see a Linux Files folder. Dragging and dropping into that file structure will copy over the files into Linux for you.
Linux Terminal
I pinned the Linux terminal to my Shelf, but you can easily get to it by going to the Launcher and the Linux apps folder.
I do wish it had tab support but right now if you want more than one terminal, you have to launch a new window. Makes for a cluttered desktop right now, so check out the Virtual Desktops section below to help minimize it.
Installing Linux Apps
Each Linux app will have a slightly different install process, but I have found that following the instructions for each of them has succeeded. Remember, the flavor of Linux the Pixelbook uses is Debian, which is a pretty common flavor of Linux and thus well supported.
I’ll list the instructions for the tools that I currently use here.
VSCode
I didn’t document the way to install VSCode when I installed it, but I believe I used the instructions here for the “Debian and Ubuntu based distributions”: https://code.visualstudio.com/docs/setup/linux#_debian-and-ubuntu-based-distributions
If you are a Linux guru, which I am not, you can also directly download VSCode from the installers page: https://code.visualstudio.com/download
The VSCode auto update seems to work fine, but I haven’t used it much since installing Idea. There is an update section on the link listed above, so it it doesn’t update properly you should check there.
Launch VSCode (two ways):
- terminal: just type
codeinto the terminal - Launcher: Go to the “Linux apps” folder and click on the icon
IntelliJ Idea
It took me a while to get Idea running, mainly due to conflicting/old documentation on the Pixelbook Linux container. Here is what I finally did. If you have a streamlined method for installing it, please let me know in the comments. I’ll update it here and give you credit.
- Download the tar.gz: https://www.jetbrains.com/idea/download/#section=linux
- Copy the tar.gz into the Linux files folder. I made a special “Installers” folder just for packages like these.
- Follow the Linux instructions for a Standalone Install on this page: https://www.jetbrains.com/help/idea/installation-guide.html
- Summary:
sudo tar -xzf ideaIU.tar.gz -C /opt - Do not extract the tarball over an existing installation to avoid conflicts. Always extract it to a clean directory.
- Summary:
- I created an alias in my .bash_aliases so I could just type
ideain the terminal to run it.
Caveat: Updating Idea
I haven’t yet successfully updated my version of Idea using the automatic update process. I’ll update this post when I successfully update.
I suspect that doing the install steps with the new tar.gz version would work fine, but I’m going to try and keep searching for something less manual.
Launch Idea (two ways):
- terminal:
- Launcher: Go to the “Linux apps” folder and click on the penguin icon with “IntelliJ Idea…”
Beyond Compare (file diff tool that I cannot rave enough about)
I used the Terminal Install instructions for Debian here, it was super simple: https://www.scootersoftware.com/download.php?zz=kb_linux_install
Launch Beyond Compare (two ways):
- terminal:
bcompare - Launcher: Go to the “Linux apps” folder and click on it’s icon
SourceTree
Nope! No Linux version. I use both Idea’s and VSCode’s built in Git tools and the command line.
I hear GitKraken is good, but I have yet to try it.
The “Shelf”
I’ve made my life easier by pinning my most used apps to the Chrome OS Shelf. It’s a simple thing so I’m not going belabor the point. Just two finger click on the app’s icon and select “Pin to shelf”.
My App is Super Tiny and Unusable! Help!
Apps on the Pixelbook don’t always know how to display themselves. It took me a month to find out the best way to run applications so that the menus weren’t super small or had weird layouts. Turns out the solution was simple: Use High Density/Use Low Density.

Before you launch an app that you are having issues with, do a two finger click on it’s launch icon. This only shows up when the icon is in the shelf, not on the icons in the Launcher! Which is why it took me forever (in development time) to find it. The menu that comes up should have an option that says Use low density. Selecting this and then launching the app will tell the app to use it’s low screen density settings, and everything should now look normal.
If you ever need to go back, just do the same two finger click and select Use high density. You’ll be back to the default app view. I have not found any apps, so far, that were not fixed by selecting the low density setting.
Launching apps from the terminal will often launch them in high density mode. If you two finger tap on the icon in the shelf, you can relaunch it in low density mode.
We’ve got our apps installed and now they are readable/usable. So far, so good!
Virtual Desktops
I have it already/I don’t have it!
In the last month or so, the Chrome OS team rolled out Virtual Desktops! Unfortunately, it may not be automatically turned on for you. To see if it is, you can click the Overview key ( []|| ). In the upper right corner of the screen you should see a button + New Desk. If not, then you can do the following:
- Make sure your OS is updated
- Check again after the update
- If you still don’t see the button, continue
- Open Chrome
- Enter
chrome://flagsinto the URL - You should see under the Experiments
Enable Virtual Desks- Enable it via the dropdown
- Restart your machine
After that, you should see the new button and can add new virtual desktops!
Switching Between
There aren’t any keyboard, or worse yet, trackpad shortcuts to switch between desktops right now. The Chrome OS developers do have it listed as something to be added, so hopefully soon.
In the mean time, to switch between desktops there are a few things you can do. These are in order of how often I use them.
- Swipe up with four fingers to bring up the Overview and click on the desktop you want. I list this first because I use it most out of habit, but the next one is more efficient.
- Click on the app in the Shelf
- This one is usually the most efficient for me, however if I have multiples of the same app open on different desktops, then it isn’t and I go back to the swipe gesture.
- alt-tab – This will switch between app windows and switches desktops as a side effect. I discovered this by accident today and is as close to a shortcut to switching desktops as I have found so far.
- Hit the Overview ( []|| ) button and click on the desktop you want.
Other Resources
I’ll post other resources as I find them here. I found that googling “X for Linux” and “X linux installer” got me much of the way there.
